The Weekend Dish – Easy Applesauce

5U5A6047

It’s apple season! I don’t know about you but this time of year finds me craving apples, in all their forms: raw, baked, pureed and pie too. Applesauce is a dish that is so much better prepared at home. Although, sometimes the convenience of the store bought variety wins out over the time it takes to prepare. But now that I have found this recipe, inspired by one of Julia Child’s recipes by the way, I have no excuse to buy applesauce instead of making from scratch, ever again! The apples don’t even need peeling and there’s no added sugar either. That’s a plus, plus in my book. There’s one more added bonus – your house will be filled with a glorious cinnamon scent.

I like to have a little fun (to me) photographing the patterns in foods, and apples also lend themselves as incredible subjects.

5U5A6067

The stars created when cutting apples laterally weren’t very prominent in these Fujis so I had some pattern creation fun.

5U5A6064

To the recipe:

Applesauce

  • 4 pounds of apples any combination, or all of one type, I used Fuji (since the skin is left on, I opted for organic) rinsed and cut into eighths, cut off the core and seeds
  • 1/2 teaspoon cinnamon
  • 2 tablespoon lemon juice
  • 1 teaspoon vanilla extract
  • pinch of salt

Combine all the ingredients in a large heavy pot with 1/4 cup water. Cover and cook over medium-low heat, stirring occasionally – adding more water if seeming to get dry – until apples are soft and falling apart, 35-45 minutes. Uncover and let cool slightly.

Put cooked apples into a food processor or blender and whir until smooth. If it seems too dry, a bit of water can be added at this point as well.

There you go, ready to be enjoyed!

5U5A6079

I like it warm or cool and accompanied by meats, fish or oatmeal, even ice cream. It’s also great on Greek yogurt for breakfast.

Enjoy ~

Susan


One way to thank a veteran

Why is it that the smallest gestures become so rich when repeated as tradition?

I ponder this as I prepare for my annual fall pumpkin bread baking custom.  The recipe is splattered with egg stains, penned upon by an enthusiastic child baker, and smudged with speckles of pumpkin from years of sitting too close to the mixing bowl.

It was a first grade teacher, Mrs. Franklin, who began the tradition when one of the original Backyard Boys was in first grade.  Mrs. Franklin guided the class through a baking lesson.  We parents thought she was teaching counting, and adding whole numbers, introducing fractions, building reading vocabulary, and instilling patience.  But of course her instruction was far deeper than that.  Did she realize the impact of her pumpkin bread lesson?

j-and-mrs-f.jpg

That day in first grade, each child took home a small loaf as a gift to their families. The bread was so much better than any pumpkin bread we’d ever tried, and the joy on the boy’s face when he realized he could bake a gift was so gleeful, we began an annual fall tradition of baking and giving Mrs. Franklin’s Pumpkin Bread.

We started close to home, that year, baking for sisters and cousins and grandparents.  The next year we branched out, sharing pumpkin bread with neighbors and friends.  The man next door who fought in the Korean War was touched. “I’ve never been remembered on Veteran’s Day before,” he said when we knocked on his front door and proffered the still-warm loaf.

Whenever we shared the bread, we always heard two things a few days later.

“That pumpkin bread was so good, we ate it all in one day!”
“Can I have the recipe?”

The Pumpkin Bread recipe began to take on a magical aura in our house as the never-fail-to-please item to take to new neighbors and friends, to potlucks and as hostess gifts to parties.  We loved to make it.

IMG_3372

Knowing that Mrs. Franklin wouldn’t mind, we added on to the tradition by photocopying the recipe and including it with the bread.  The recipe wasn’t beautiful anymore but it bore its badge of frequent use with good humor.  Like love and wise lessons from first grade teachers, Mrs. Franklin’s Pumpkin Bread was soon travelling far from its original source.

Lynn began a pumpkin bread-giving circle in Kansas City.
Mustafa took it to his family in St. Louis where it’s now a fall tradition in his home.
Bharti made it and sent it to her family in Mumbai.

As the cousins grew up and moved away to college they knew they could count on a Backyard Sister Fall Care Package that always included pumpkin bread nestled in tissue paper.  It arrived safely and fragrant from California to  Washington, D.C., and Boston, to Chicago, and Iowa City and Tucson, Arizona.

Mrs. Franklin’s Pumpkin Bread was even snuck into Pauley Pavilion in the interior pocket of a giant khaki raincoat as a fall treat for the UCLA Men’s Basketball team.  When the Backyard Boy left home to play basketball in Malaga, Spain, he received a care package in time to celebrate his first Thanksgiving in Europe with the taste of home.

Even though we’ve never actually met you, our loyal readers, I see no reason why we can’t share the recipe.  I’m absolutely positive that Mrs. Franklin would like that.  So, with love from her, and from the Backyard Sisters, here it is.

Bake it soon, with a child. And when you get a chance, walk with it, still warm, to someone who served our country. Say thank you. You can’t imagine what kind of goodness you might be sowing there among the brave acting as if all you are doing  is sharing bread.

With pumpkin and spice,
~Catherine


Citrus and Sizzle

Today’s August Break 2015 prompt is “citrus” and the photo comes courtesy of Susan Greene, the other original Backyard Sisters. _MG_0380One stifling afternoon, Susan’s daughter wondered what would happen if you added jalapeño to lemonade. Her kitchen curiousity inspired this refreshing and slightly spicy, hot yet cold, beverage. It’s a wonderful anomaly, so delicious it earned a spot in the Backyard Sisters family cookbook. 

For the complete recipe, check out Susan’s post: The Weekend Dish, Jalapeño Lemonade.  For more “citrus” images from The August Break project, search #augustbreak2015 on Instagram, Facebook, and Flickr.

Cheers!

The Weekend Dish – Avocado, Cilantro, Cashew Cups

Avocado, cilantro, cashew cupsInspired by the avocado egg rolls at the Cheesecake Factory restaurant, I headed to the kitchen to see what I could come up with to achieve similar flavors and textures at home. They are a mixture of crispy outside and creamy inside all dipped in a tangy and sweet sauce – a delicious treat. It takes great restraint to keep me from drinking the dipping sauce on it’s own. Wanting the crunchiness of the outside but not the greasiness and mess of frying, I decided to use wonton wrappers and bake them until crispy.

Avocado, cilantro, cashew cupsDipping the cups in the sauce could make it awkward to eat, so I opted to mix the dipping sauce and filling together and then place them in the cup, creating a two bite finger food, success! One of our seasonal family birthday celebration extravaganzas was the inaugural attempt of this recipe and it was a hit. I think you will find this handy appetizer a welcome guest at your next party too.

Avocado, Cilantro, Cashew Cups

  • 1 pkg of wonton wrappers
  • 2 ripe avocados, peeled, pitted and diced – it helps to have ripe but firm avocados
  • 2 Tbsp red onion, finely chopped
  • 1 Tbsp cilantro, chopped
  • 1/4 tsp salt

Place the wonton wrappers in a mini muffin tin and press them in to the bottom and sides. Bake in a preheated 350° oven for 9 minutes or until slightly browned. Remove from oven and leave in pan until cooled. Meanwhile place the avocados, onion, cilantro and salt together in a medium bowl, being careful to keep the avocados in pieces rather than smashing. Set aside and prepare the sauce.

Sauce

  • 4 tsp white vinegar
  • 1tsp balsamic vinegar
  • 1/3 cup honey
  • juice of 1 lime

Mix these together in a microwave safe bowl for 30 seconds and stir until the honey is dissolved, set aside. In a food processor combine:

  • 1/2 cup cashews
  • 2/3 cup cilantro
  • 2 cloves of garlic
  • 2 green onions
  • 1 tsp cumin
  • 1 tsp black pepper
  • 1 tsp soy sauce
  • pinch turmeric
  • 1/4 cup olive oil, or less depending on your taste

Pulse until the cashews are chopped fine, add the vinegar honey mixture and olive oil and pulse until incorporated. Pour about half of this mixture, more or less depending on your taste, into the avocado onion mixture and stir until just mixed. Fill the cups and serve.

Makes 24 cups

Avocado, cilantro, cashew cups

This weekend finds us celebrating the winter birthdays of the family.

Cheers!

~ Susan

The Weekend Dish – Scalloped Tomatoes

By Susan Greene
The first dish we are bringing to the table from our grandmother’s recipe box is one which has also made it into the family cookbook Catherine compiled a few years back. I don’t remember the exact occasion when I first tasted this dish. It could have been at a family party or a dinner served during a weekend visit. I do remember thinking it was delicious and wanting to have it again. It is simple to prepare and yet impressive, two of my favorite qualities in a dish. Fresh tomatoes could be used in the summertime when they are readily available.

scalloped tomatoesIf you like bread, cheese and tomatoes, there’s a very good chance you will love this dish also.

minced onions

Scalloped Tomatoes

  • 1 – 1 pound can of whole tomatoes, quartered
  • 4 slices of toast or 1 1/2 cup of croutons ( I used a combination of the two, I had some leftover bread to use up, so cubed it and toasted it in the oven)
  • 1 tablespoon minced onion
  • 1/4 cup melted butter, or olive oil
  • 1 cup cubed mozzarella cheese
  • 1 cup cubed cheddar cheese
  • pinch of salt
  • 1/4 teaspoon pepper

Combine all ingredients in a 1 1/2 – 2 quart casserole dish.

scalloped tomatoes ready to bakeBake uncovered at 375° for 20 minutes.   Serves 4-5.

scalloped tomatoesThat’s all there is to it!

Here’s to warm, yummy comfort food for your weekend.

~ Susan

The way to a friend’s heart

Today’s post comes courtesy of Theresa, the eldest Backyard Sister. Her story of a dinner party gone awry might be partially my fault.  I’m the one who compiled the family cookbook. Did I get the recipe wrong? ~ Catherine

Miracles HappenBy Theresa Lower
January brings the hope of new beginnings. M and I resolve to perfect the art of entertaining this year. We vow to plan ahead, no more last minute preparations or improvisational meals. We’re going to be relaxed and ready when our guests arrive. And so, we decide to have a dinner party to practice, not our usual impromptu get-together, but a real grown-up evening of food and conversation, music and appetizers. Nothing too fancy, but a meal with a plan and recipes, real recipes followed to the letter, an evening to remember.

The milestones and holidays in our family have a signature dish that identifies the event as special, and many of these beloved recipes have been transcribed and compiled into a family cookbook by Catherine. We turn to this cookbook for the perfect winter meal. What better Winter-in-Des Moines offering to our friends than the Christmas Eve Chili I’ve eaten at my parent’s house for years? I’ve never made it, but how hard can it be?

Party day arrives. M and I move through most of the items on our to-do list when we begin to cook about 4:00; the guests will arrive at 7:00.  We tell ourselves we’ll easily be ready on time, probably spend the last hour relaxing with our feet up. After all we just have to mix everything together and stir occasionally. M, who bought the groceries the day before, asks if the ingredients will fit into the pot. “Sure,” I say and pull four pounds of stew meat and three pounds of pork tenderloin out of the refrigerator.

Undaunted, I review the recipe. Seven pounds of meat, yes! Onions and garlic sizzle on the stove. hovers over the pot. “Are you sure this is all going to fit?”  I feel a small twinge of doubt, break my resolve to follow the recipe, and decide to use only three quarters of the stew meat and half the pork. The pot is full. I eye the clock and the seven cans of beans and chopped tomato on the counter and begin to feel desperate.

We get out the crockpot and a frying pan, put half the meat in the frying pan and the beans and tomato mixture into the crockpot. valiantly stirs both kettles of meat. After the last can of beans is emptied into the crockpot, I review the ingredients again. Now, I worry in earnest. The beans and tomato form a congealed mass, even with the liquid from the chopped tomatoes. I can’t imagine how I’ll be able to mix in the meat. I search the recipe for liquid – water, broth, tomato sauce? No liquid, but I’m confident, I’m following a recipe with years of tradition behind it.

We add the meat to the beans in the crockpot and stir, hoping it will be transformed into the blend of succulent meat and savory beans I remember. Instead it begins to scorch. We dump all the ingredients back into the original pot. They barely fit, but at least we can control the heat.  “We’ll have to stir frequently,” I say.

I wish I could tell you that we defied the recipe and added liquid. No, we stubbornly clung to the belief that the recipe was right, even when faced with mounting evidence that it was not. The mixture continued to cook only on the bottom, and because of its density, as the heat rose, so did the chili, heaving itself up and forming small blow holes that hissed when we tried to stir it with a feeble wooden spoon. I began to think of it as the Monster on the Stove. And sadly, that it remained.

Instead of developing a rich broth as it simmered, the chili got thicker and thicker as the beans broke down. When it was finally served, we presented a heavy lump of meat with an occasional bean.

Untitled

Our friends were gracious. They bravely chewed and enthusiastically declared the meal delicious. We laughed and shared stories and mostly finished our servings of Christmas Eve Chili. All politely refused a second portion, claiming it was so hearty they couldn’t possibly eat more.

I’m humbled, both by the generosity of friendship and my own foolishness in refusing to trust my instincts.  As for putting our feet up and relaxing before the guests arrived, at 6:15pm I was trying to re-hang a kitchen cabinet door that had somehow fallen off and was vacuuming. Next time we practice the art of entertaining, we’ll use a recipe we know and make it the day before.

I still have to ask Mom and Dad to tell me the secret to the family chili. Then maybe Catherine can edit the family cookbook.

Want to come over for dinner soon?
~Theresa

The Weekend Dish – Olive Cheese Balls

olive cheese ball appetizer

By Susan Greene
Lets start this weekend with a trip back to the beginning. This appetizer is an oldie but goodie. Our mother used to make them for parties in the 70’s.  I chose to copy the recipe from my mother’s recipe box when I got married and started my own recipe box some 30+ years ago. These days, the internet is my main search destination for recipe ideas and my recipe box holds the tried and true favorite recipes of my own family which I work into the rotation now and then. The olive cheese ball appetizers were forgotten until this past Christmas when they made a surprise appearance at our family celebration. Thank-you Catherine for bringing them. I am happy to become re-acquainted. The richness of the crunchy, cheesy coating is a perfect complement to the salty, tangy olives with a little heat from some cayenne pepper adding a little kick.

olive cheese ball appetizer ingredients

Olive Cheese Balls

  • 1 cup grated cheddar cheese
  • 3 Tablespoons softened butter
  • 1/2 cup flour
  • 1/2 teaspoon paprika
  • 1/4 teaspoon cayenne pepper
  • 24 stuffed olives – these can be stuffed with whatever you prefer, garlic, almonds, jalapenos or pimientos. Some stuffed olives are larger than the average pimiento stuffed ones and if you want 24 wrapped olives you will probably need to double the cheese mixture if using the larger ones.

olive cheese ball appetizer preparation

Blend the cheese and butter, using a pastry cutter, until incorporated. Stir in the flour, paprika and cayenne pepper. Drain and dry the olives (it is important to completely dry the olives for the cheese mixture to stick.) Wrap the olives with about a teaspoon or more of the mixture and spread until completely covered. Place on a lightly greased or parchment-lined cookie sheet and bake at 400°, 10-15 minutes or until lightly browned.

Note: The backyard sister also made some without olives on Christmas and they are delicious that way too.

olive cheese balls appetizersThe re-discovery of this recipe is the aha moment for launching a project we have discussed, off and on, since beginning this blog. Our grandmothers were experts at preparing some of the most delicious foods and meals. We think their recipe boxes could be veritable treasure troves of scrumptious recipes and we will be using them for recipe inspiration in the coming weeks. It is a sentimental exploration for us, from reading the mostly handwritten recipes with accompanying notes to experiencing the fond memories the dishes will most certainly evoke. Hopefully, you will find a recipe or more to add to your repertoire.

With anticipation of dishes of old being new again.

~ Susan

The Weekend Dish-Irish Soda Bread

The song begins the moment first guests arrive, a ditty all four Keefes learned by heart one summer when an Irish singalong CD was our soundtrack while driving backroads from Dublin to Shannon.
(Go ahead, click play and listen while you read.)

At our house on March 17, “there’s a welcome there for you” regardless of where you hail from. We invite the intrepid and seasoned St. Patrick Day’s revelers in for a taste of tradition dating beyond our family trip to the homeland, beyond the Backyard Sisters’ mom making corned beef, back, back to the maternal and paternal grandmothers who couldn’t let a March 17 pass without corned beef and a haunting round of “Too-Ra-Loo-Ra-Loo-Ral (That’s an Irish Lullaby) sung a capella in the kitchen.

At the O’Keefe’s Hooley on St. Patrick’s Day, “whoever you are you’re one us,” ’tis true. But there are three hard and fast rules for being a good guest.

Sing along.
Wear green.

St Pattys Day Maizie Maizie the Wonderlab.  Photo Credit: James Keefe

And kick off your shoes to kitchen jig.

kitchen danceWe take care of the rest by creating a feast based on updated versions of the Irish classics of corned beef, cabbage, potatoes; some sort of green vegetable, an ancient green jello salad recipe, and Irish soda bread.

Table Setting

The corned beef is boiled in the conventional manner, then treated with a catsup, horseradish, mustard, brown sugar, and melted butter glaze which is brushed over the beef, then oven roasted for 30 minutes at 350 to create a savory, almost caramelized coating. Cabbage is oven roasted in olive oil so it browns and remains more crisp than its boiled cousin. Potatoes are mashed, country style with roasted garlic and laced with parsley. Usually by the time I’m finished making all of this, enthusiasm and time left to make soda bread have waned.

And honestly, up until last year, for me Irish Soda Bread wasn’t anything worth troubling over. Some years I whipped up Bisquick biscuits; other times I called Pop ‘N Fresh biscuits Irish, or better yet, I passed out bread duty to guests. As the luck of the Irish would have it, last year my friend Maureen brought the bread that changed my mind about it being a second class citizen at the feast. And wouldn’t you know, this recipe is straight from Ireland by way of her mother.

Soda Bread

Eileen Shea’s Irish Soda Bread. Photo Credit: James Keefe

Here’s the story behind the bread, in Maureen’s words.

The Irish soda bread is a very fond memory from my mom, Eileen Shea. Her parents came over from Ireland and met in buffalo NY , settled in an Irish neighborhood there. My mom had been making the bread for many years, always on St. Paddy’s day, along with corned beef and cabbage if course!  I began making the bread when I had our daughters and wanted to keep the Irish tradition alive for them…. I make it every St. Paddy’s…I hope the girls will carry on the recipe when they have their own families….

It’s funny because I am out here in the desert with my Buffalo cousins , who have kept up the same tradition and actually brought us a wonderful loaf of soda bread on the plane …we have been eating it as we speak, the same recipe that our moms have shared ….

So cheers to you and cheers to Eileen and Maureen and the Buffalo cousins.  “Whoever you are, you’re one of us.”
Happy St. Patrick’s Day.
~ Catherine

Eileen Shea’s Irish Soda Bread
Preheat oven to 350

  • 4 Cups flour (scant)
  • 1 T baking powder
  • 1 tsp. baking soda
  • 1 tsp. salt
  • 2/3 Cup sugar
  • 3/4 Cup butter (chilled)
  • 1 Cup raisins
  • 2 tsp. caraway seeds
  • 1 1/3 Cups buttermilk

Mix dry ingredients in large bowl. Cut in butter. Add raisins, caraway seeds, and milk. Turn out on a floured board. Knead about one minute. (Maureen divides dough in half and makes two small round loaves.)

Bake on cookie sheet for 50-60 minutes until brown and crackled.

bread blessing

The Weekend Dish-Sea Salted Chocolate Chip Cookies

One of our favorite Backyard Sister family chefs, Michele of Creamy Tomato Soup fame, returns today with her recipe for Sea Salted Chocolate Chip Cookies.

Cookies During

A few weekends ago, I had the taste for something sweet and the time on my hands to try a new recipe. I recently subscribed to Bon Appetit, so I have had no shortage of inspiring food photos and recipes. I figured, why not give one a try? I decided to go with a recipe for Sea Salted Chocolate Chip Cookies. Whether it is in the form of sea salted caramels or chocolate covered pretzels, I have always been a fan of the sweet and salty combo.

cookie dough

Sea Salted Chocolate Chip Cookies

  • 1 1/2 cups all-purpose flour
  • 1 teaspoon baking powder
  • 1/2 teaspoon kosher salt
  • 1/4 teaspoon baking soda
  • 1/2 cup (1 stick) unsalted butter, room temperature
  • 3/4 cup (packed) light brown sugar
  • 1/2 cup sugar
  • 1/4 cup powdered sugar
  • 2 large egg yolks
  • 1 large egg
  • 1 teaspoon vanilla extract
  • 8 ounces semisweet or bittersweet chocolate (do not exceed 72% cacao), coarsely chopped. Or you can use chocolate chips.
  • Maldon or other flaky sea salt

Place racks in upper and lower thirds of oven and preheat to 375°. Whisk flour, baking powder, kosher salt, and baking soda in a medium bowl; set aside.

Using an electric mixer on medium speed, beat butter, brown sugar, sugar, and powdered sugar until light and fluffy, 3-4 minutes. Add egg yolks, egg, and vanilla. Beat, occasionally scraping down the sides of the bowl, until mixture is pale and fluffy, 4-5 minutes. Reduce mixer speed to low; slowly add dry ingredients, mixing just to blend. Using a spatula, fold in chocolate.

Spoon rounded tablespoonfuls of cookie dough onto 2 parchment paper-lined baking sheets, spacing 1-inch apart. Sprinkle cookies with sea salt. Bake cookies, rotating sheets halfway through, until just golden brown around the edges, 10-12 minutes (the cookies will firm up as they cool). Let cool slightly on baking sheets, then transfer to wire racks; let cool completely.

Cookies - Finished

Chef’s Note: I cooked the first batch a little too long, so I took the second batch out of the oven earlier. To the eye the cookies almost looked undone, but they do continue to cook and harden after being removed from the heat.

This recipe made about 24 cookies, which was way to many to have lying around the house tempting me, so I shared with others. They were a hit!

~With sweetness,
Michele

The Weekend Dish-Creamy Tomato Soup

Through the wonders of an Instagram discovery moment, and the beautiful truth behind the line, “like mother, like daughter,” today’s Weekend Dish comes to you courtesy of Sue’s daughter, Michele Greene, one of the original Backyard Cousins.

During the chilly fall months in Chicago there are times when nothing sounds better than a warm bowl of soup. This time it was creamy tomato soup compliments of a little Bon Appétit browsing. In thinking of what to pair with tomato soup the natural choice was grilled cheese, however, I didn’t want to stick with your ordinary grilled cheese, so I chose a Gruyere and caramelized onion on baguette twist.

Hopefully this soup and grilled cheese keeps you warm on a blustery day. For me, the process of making homemade soup gives a whole new meaning to “soup for the soul.” It’s a process that cannot be rushed and must be savored. So often, our lives are go, go, go and it is nice to slow down and pay mind to the many detailed flavors and the slow simmering of a delicious pot of soup.

Creamy Tomato Soup
1/4 cup (1/2 stick) unsalted butter
10 sprigs thyme, tied together
1 medium onion, thinly sliced
2 garlic cloves, thinly sliced
1/4 cup tomato paste
2 28-ounce cans whole tomatoes
1–2 teaspoons sugar, divided
1/4 cup (or more) heavy cream
Kosher salt, freshly ground pepper

Melt butter in a large pot, and then add the thyme, onion, and garlic (I use crushed garlic paste – great flavor and less work). Cook until the onion is translucent and tender.

Increase heat to medium-high.   Add tomato paste. Continue cooking, stirring often, until paste begins to caramelize in spots.

Add tomatoes with juices, 1 tsp. sugar, and 8 cups water to pot. Increase your heat to high and bring to an almost boil, then reduce heat to medium. Simmer until flavors meld (about an hour).

Remove soup from heat and let cool slightly. You will want to discard the thyme sprigs.

Now, you have two options: either work in small batches puréeing the soup in a blender until the entire batch is smooth, or use an immersion blender and work in the original pot. I bought a Cuisinart Smart Stick immersion blender a while back on a whim. I believe it was suggested in one of the recipes I wanted to experiment with and it had always been a kitchen tool that captured my curiosity, so I decided to give it a go. I can now say it is an incredibly handy kitchen tool.

Anyway, once your soup is properly pureed, stir in 1/4 a cup of cream. Simmer the soup a bit longer until all flavors come together, 10–15 minutes or longer. The last step is to season to taste with salt, pepper, and remaining 1 tsp. sugar.

You can add more cream, if desired, but I couldn’t bring myself to do. I always think of my Mom’s hearty and delicious meals that often use half the called-for butter, or creatively substitute Greek yogurt for sour cream. The thought of actually using heavy cream in a dish made me wince a bit, but 1/4 cup was the perfect amount.

While waiting for the soup to come together in the last 10 minutes of simmering, I began the grilled cheese.

Michele’s Chicago Grilled Cheese Round One
Olive oil – enough to coat a sauté pan and one long baguette
One onion, sliced thinly
One long baguette
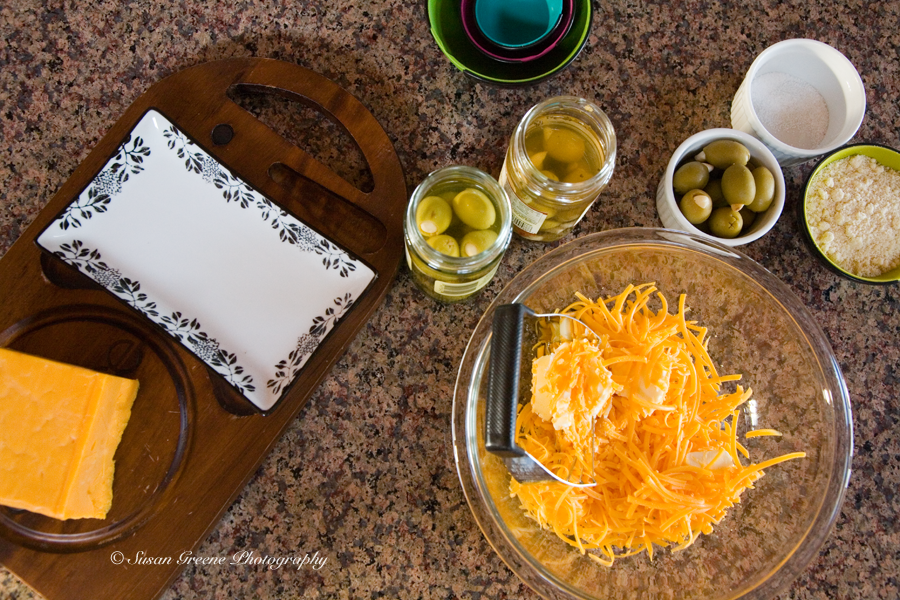
Gruyere cheese, 1-2 cups shredded

Simply, pour a nice amount of olive oil in a sauté pan and place your sliced onion in it. Cook until the onion becomes caramelized.

While waiting on the onion, cut the baguette in half lengthwise. Put a very thin layer of olive oil on the baguette, and place under your broiler for a moment, just until it gets a nice crisp. Once the baguette is crispy place your caramelized onions on top.

Lastly, top your onions with a liberal amount of Gruyere cheese. Place under the broiler once again; just long enough for the cheese to melt. Enjoy!

Michele’s Chicago Grilled Cheese and Creamy Tomato Soup, Day Two

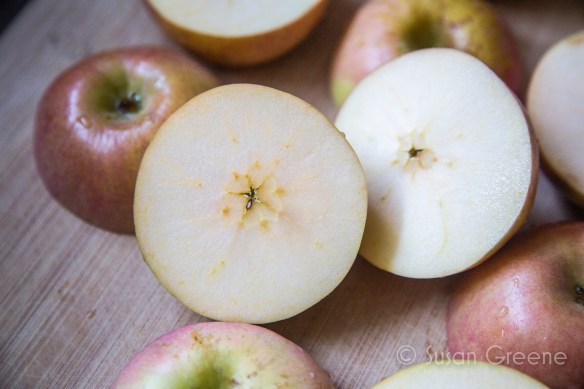
A few days after my initial soup-making venture, I reheated the soup and added apple and Roclette cheese to the previous grilled cheese recipe. Actually, I can’t take credit for that part at all. I have a co-chef that joins me in my cooking adventures. I love being able to bounce ideas off a fellow cooking enthusiast!

~Michele

p.s. If you want the perfect dessert for this meal, check out last week’s Chocolate Caramel Dandy recipe and vote for the Backyard Sisters entry in the L.A. Times Holiday Cookie Bake-Off.  Hurry! Voting ends November 12.