The Weekend Dish – Hot Fudge Pie

_MG_1057In the mood for baking and chocolate? I was recently; and here is something that fits both those desires perfectly. This recipe has been in our family so long I have forgotten where the original came from. It can be made with a store bought pie crust but this time I was really in the mood for baking and made mine from scratch. It has been awhile since I did this and I forgot how fun it can be plus how nice it is knowing exactly what is in the crust you are eating and being able to pronounce all the ingredients ( which isn’t very many).

I will start with the pie crust.

_MG_1028Four ingredients that’s all:

2 cups all-purpose flour
1/4 teaspoon salt
2/3 cup cold butter, I cut mine and put in freezer a short time
4 to 5 tablespoons cold water
Mix together the flour and salt in a large bowl. Cut in the butter with a pastry blender or fork until it resembles coarse crumbs.
_MG_1031Add water just enough water, with fork, to moisten the flour.
_MG_1043Divide dough in half and wrap each in plastic. Refrigerate for 2 hours to overnight.
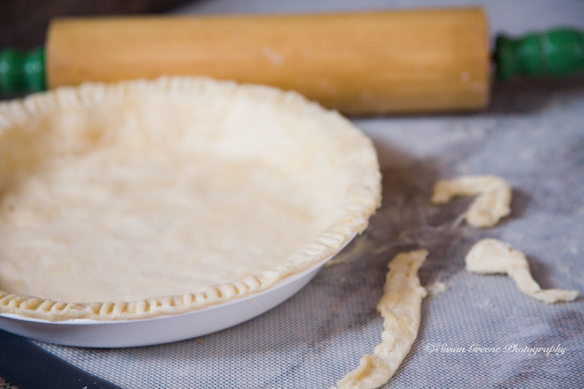
_MG_1044Roll out a ball of the dough to fit in a 9-inch pie pan, so roll to about 12 inches.
_MG_1048Trim the edges and press around the edges with a fork, or fold the excess dough up and flute the edges.
Now for the filling:
  • 1/4 cup unsweetened cocoa powder
  • 2t flour
  • 1 cup sugar
  • 2 lg eggs
  • 2t vanilla extract
  • 1 cube butter, melted
  • 1 unbaked 9 inch pie shell

Mix cocoa, flour, and sugar in a medium bowl. Add eggs, vanilla and butter.

_MG_1051Mix well. Pour into the pie shell.

_MG_1055Bake at 350º about 25 minutes.

_MG_1170It is delicious warm, on its own or with ice cream.

_MG_1180After trying it, you will come to realize why our father nicknamed it “good-bye” pie…

_MG_1188

Dare I say it is as “easy as pie”, and sure to impress.

May your chocolate dreams come true.

~ Susan

The Weekend Dish – Peach Cake

_MG_9645peachesThis time of year the fruit is plentiful and delicious. The peaches, plums, cherries and berries are emitting their sweet fragrances as I walk in the produce aisle of the store. Being especially fond of peaches, I like to use them as much as possible during this season. Aside from eating them alone, I like to add them to cereal, ice cream and use them to top pancakes or add them to a cake.

_MG_9687peach cake

I first tried this recipe from Cook’s Illustrated about a year ago and dreamed about it until this peach season came around again (I suppose canned peaches could be used but I like the seasonal anticipation). The recipe takes a little more effort because half of the peaches are roasted and all are macerated.

_MG_9649peachesBut it is well worth the effort.

_MG_9652peaches

_MG_9656peachesRoasting the peaches concentrates the flavor as well as releases some of the juices thus helping to avoid a soggy cake. Panko crumbs are added to the roast peaches after they come out of the oven to further ensure the avoidance of “soggy cake syndrome.” I didn’t use the peach schnapps called for in the recipe because I like the true peach flavor to shine through.

_MG_9690peach cake

                                      Peach Cake

adapted from Cook’s Illustrated

  • 2 1/2 pounds peaches
  • 4 tsp lemon juice
  • 6 Tbsp plus 1/3 cup granulated sugar
  • 1 cup all-purpose flour
  • 1 1/4 tsp baking powder
  • 3/4 tsp salt
  • 1/2 cup packed light brown sugar
  • 2 large eggs
  • 8 Tbsp unsalted butter, melted and cooled
  • 1/4 cup sour cream
  • 1 1/2 tsp vanilla extract
  • 1/4 tsp plus 1/8 tsp almond extract
  • 1/3 cup panko bread crumbs, finely crushed

Preheat oven to 425°. Line a rimmed baking sheet with foil and spray with oil spray. Pit the peaches and slice into 1/2 inch thick wedges. Place 24 of the slices into a bowl and gently toss with 2 tsp lemon juice and 1 Tbsp sugar; set aside. Cut the remaining peaches into thirds crosswise. Place in a bowl and toss with remaining 2tsp lemon juice and 2 tbsp granulated sugar. Spread peach chunks on prepared sheet in a single layer and bake until the juices begin to thicken and caramelize, 20-25 minutes. Remove and cool to room temperature.

Reduce oven temperature to 350°. Grease a 9-inch springform pan. Whisk flour, baking powder and salt together in a bowl. Whisk brown sugar, 1/3 cup granulated sugar, and eggs together in second bowl until thick and thoroughly combined. Slowly whisk in butter until combined. Add sour cream, vanilla and 1/4 tsp almond extract and whisk until combined. Add flour mixture and stir until just combined. Transfer half of the batter to the prepared springform pan and spread evenly over the bottom. Sprinkle panko crumbs over the cooled peaches and gently toss to coat. Arrange peach chunks evenly over the bottom layer of batter gently pressing peaches into surface of the cake. Spread the remaining batter over the peaches and smooth the top. Arrange the reserved peach slices in a ring on the top, using smaller ones for the center. Stir together remaining 3 tbsp granulated sugar and 1/8 tsp almond extract in small bowl and sprinkle over the top of the cake. Bake until toothpick inserted in center comes out clean, 50-60 minutes. Transfer pan to wire rack and cool 5 minutes. Loosen sides of pan by running a knife around the edge of the cake. Remove sides of pan and allow cake to cool completely. _MG_9696peach cake

Serve and enjoy!

To summer’s bounty,

~ Susan

The Weekend Dish – Checkerboard Cake

_MG_8216Adventures and experiments in the kitchen can be challenging and fun. Trying to come up with a dish to go with this month’s theme of patterns, a checkerboard cake immediately came to mind. Never having made one and a bit uncertain about what seemed like a daunting task, I suppressed the idea for a day or two exploring other possibilities but I kept coming back to the cake and readied myself for a challenge. First, I learned there is a special pan one can buy for creating this effect, but not wanting to invest in one and, with further research, I found a video online of Buddy, the cake boss, teaching Rachael Ray how to make a checkerboard cake using cookie cutters.  Well, without circle cookie cutters, I improvised using a glass and a glass vase ( thoroughly cleaned of course ). Checkerboard cake here we come. First task is making chocolate and vanilla cakes.

_MG_8208Most cakes after cooking have a slightly rounded top, at least mine do, so to get even layers that will sit flatly on top of each other; after the cake has cooled, trim about one quarter of an inch off the top. Then cut concentric circles from the center out and you will have three circles of cake.

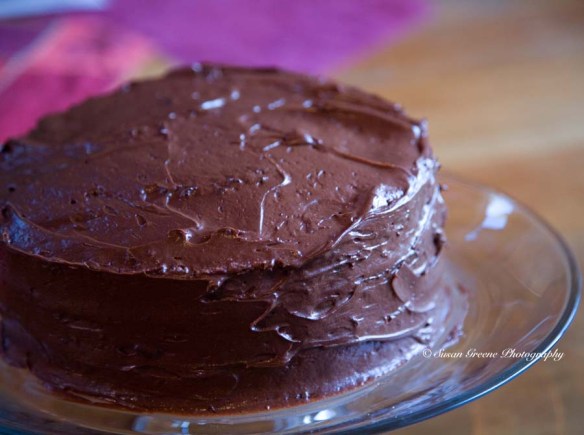
_MG_8211Next step is to alternate the chocolate and vanilla rings. If you have a vanilla ring on the outside insert a chocolate ring next and finish with a vanilla ring in the middle. After assembling your first layer, apply frosting. I learned a trick from the cake boss – use a bag to apply the frosting. I used a ziploc bag and cut a hole in one of the bottom corners. By applying the frosting this way, all you have to do is gently spread it around to smooth it out and it keeps it from getting full of crumbs. For the next layer, start with chocolate on the outside then vanilla and finish with chocolate in the center then add frosting again. I made a three layer cake so for the last layer I repeated the pattern of the first layer. Then apply frosting to entire cake. I could have made another layer but ran out of frosting. . . and time.

_MG_8221It’s fun cutting into the cake and revealing the impressive checkerboard pattern!

_MG_8234I made the cakes from scratch because I prefer that to mixes, but if you want you can use cake mix. I put my foot down at the frosting from the grocery store though; it’s just not as good as homemade!

 Hershey’s “Perfectly  Chocolate” Chocolate Cake  (from the Hershey’s Cocoa box)

  • 2 cup sugar
  • 1-3/4 cup all-purpose flour
  • 3/4 cup Hershey’s Cocoa
  • 1-1/2 tsp baking powder
  • 1-1/2 tsp baking soda
  • 1 tsp salt
  • 2 eggs
  • 1 cup milk
  • 1/2 cup vegetable oil
  • 2 tsp vanilla extract
  • 1 cup boiling water

Heat oven to 350° F. Grease and flour two 9-in. round cake pans. Combine dry ingredients in a large bowl. Add eggs, milk, oil and vanilla; beat on medium speed 2 minutes. Stir in boiling water (batter will be thin). Pour into pans. Bake 30-35 minutes or until a wooden pick inserted into center comes out clean. Cool 10 minutes, remove from pans to wire racks and cool completely.

Yellow Cake (from Better Homes and Gardens New Cookbook)

  • 3 cups all-purpose flour
  • 2 cups sugar
  • 1 Tbsp baking powder
  • 1-1/2 cups milk
  • 1/2 cup butter,softened
  • 1-1/2 tsp vanilla (I doubled this, I like vanilla a lot)
  • 2 eggs

Preheat oven to 375° F. In a large bowl combine dry ingredients. Add milk, butter, and vanilla. Beat with electric mixer on low speed until combined. Beat on high speed for 2 minutes. Add eggs and beat 2 minutes more. Pour into 2 greased and floured 9 in. round cake pans. Bake for 25-30 minutes or until wooden pick inserted in center comes out clean. Cool on wire racks for 10 minutes. Remove from pans until cooled completely.

“Perfectly Chocolate” Chocolate Frosting (also from Hershey’s Cocoa box)

  • 1/2 cup (1 stick) butter
  • 2/3 cup Hershey’s cocoa
  • 3 cups powdered sugar
  • 1/3 cup milk
  • 1 tsp. vanilla

Melt butter. Stir in cocoa. Alternately add powdered sugar and milk, beating on medium speed to spreading consistency. Add more milk, if needed. Stir in vanilla. Makes about 2 cups frosting.

I once and a halved the frosting recipe but I didn’t have enough to make a fourth layer so I would double it next time.

If you would like to watch the Rachael Ray video click here.

This can be made with different colored and flavored cakes also.

It makes me want to go play a game of checkers. While eating cake of course!

~ Susan

The Weekend Dish – Brownie Cheesecake

Culinarily exploring this month’s theme of contrast, I hit upon the brownie cheesecake. It is a delicious, indulgent dessert which is a fine example when used as a study in contrasts. The white cheesecake on top of the dark brownie highlights the tonal contrast. In addition, there is textural dissimilarity between the smooth, creaminess of the cheesecake layer and the chewy, dense brownie layer. When these two components are mixed together, the result is sheer bliss.

brownie cheesecakeI had to mute my “healthy eating inner voice” for awhile and turn up the volume on the “oh this is going to be good voice”, (another contrast for me) turning a blind eye to the nutrition information as I added the 4 – 8oz blocks of cream cheese. I couldn’t help thinking of calories as I lifted the 13″ X 9″ pan taking note of the poundage. However, I can report, putting my inner turmoil aside was so worth it. This brownie cheesecake is scrumptious.

brownie cheesecakeI found the recipe on the Kraft foods recipe website but I did make a few adjustments.

Brownie Cheesecake

1 pkg. (19 to 21 oz.) brownie mix (I used Ghirardelli brand double chocolate)
4 pkg. (8 oz. each) PHILADELPHIA Cream Cheese, softened. I used two neufchatel cheese (a lighter cream cheese)
1 cup sugar
1 Tbsp. vanilla (I upped this from 1 tsp)
1/2 cup sour Cream
3 eggs
1 cup semi-sweet morsels (Ghirardelli again)

HEAT oven to 325°F.

PREPARE brownie batter as directed on package; pour into 13×9-inch pan sprayed with cooking spray. Bake 25 min. or until top is shiny and center is almost set.

MEANWHILE, beat cream cheese, sugar and vanilla in large bowl with mixer until well blended. Add sour cream; mix well. Add eggs, 1 at a time, mixing on low speed after each just until blended. Gently pour over brownie layer in pan. (Filling will come almost to top of pan.)

BAKE 40 min. or until center is almost set. Run knife around rim of pan to loosen sides; cool. Refrigerate 4 hours.

MELT chocolate morsels in double boiler; drizzle over cheesecake. Refrigerate 15 min. or until chocolate is firm.

You may want to slice before the chocolate becomes to firm or else it pops off the top and the presentation isn’t as nice.

I especially liked the Kraft kitchen tip at the bottom of the recipe:

Balance your food choices throughout the day so you can enjoy a serving of this rich-and-indulgent cheesecake with your loved ones.
You will definitely want to share this with your loved ones. I took half of the pan to share with some friends and even though I would love to keep the other half for myself, I dare not.
brownie cheesecakeYou will find me this weekend supplementing my exercise routine by adding another day of walking and climbing an extra flight of stairs or two, also looking for loved ones to share the goodies with and. . .  indulging in a few pieces of rich brownie cheesecake myself; savoring every bite!
Indulgently yours,
~ Susan

The Weekend Dish

brownies, dessert

Brownies –  chocolaty, chewy brownies, are one of my favorite desserts. Over the years, I have made countless batches and tried many different recipes. While some are very good, I think that there are a couple of types of brownie mixes that produce results just as good as, if not better than, the ones I have made from scratch. And let’s face it sometimes you just don’t have the time to make something from scratch but still want that fresh baked, warm from the oven goodie.

brownies, dessert

My two favorites are Trader Joe’s truffle brownie mix and Ghirardelli”s double chocolate brownie mix. When making the Trader Joe’s mix lately, I have been using olive oil instead of the melted butter, with the intent of making it lower in saturated fats. The result has been an excellent, moist brownie.

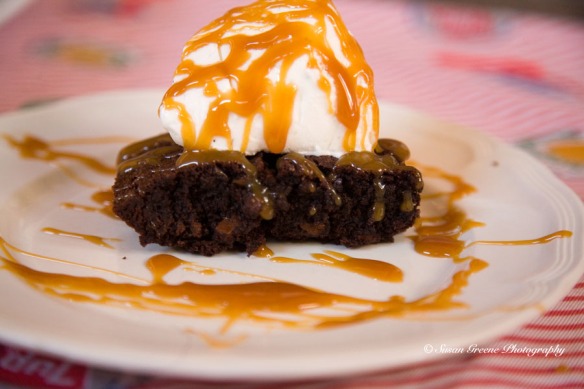
brownie mix and ingredientsThe brownies can be mixed up, baked and ready in a little over an hour – which also allows for a half an hour of cooling time. Both these mixes include chocolate chips and if you wanted to, you could add nuts or maybe some dried fruits as well. For another treat and perhaps dessert for a dinner party top a brownie with vanilla ice cream and drizzle your favorite caramel sauce over the whole thing (could even be topped with whipped cream.)

brownie sundaeI sure enjoyed preparing and photographing this recent batch, which also had the added benefit of making this backyard sister’s house smell wonderful; yet another reason to bake! We will be indulging all weekend long.

brownies, dessertAll in the name of art!

~ Sue

The Weekend Dish – Scones

Well, it has finally arrived. The opening day of the Summer Olympics is today.

Buckingham Palace

In honor of the host city, London, I felt scones would be a proper food tribute. 

The scone is a simple but delicious quick bread. It is traditionally served with clotted cream and jam. The basic recipe is versatile and can be modified by adding nuts, chocolate chips, zests, and fresh or dried fruits. My favorite addition is dried tart cherries.

They can be served with tea or they are also an excellent accompaniment to coffee. A few years ago, I found this recipe while trying to have a full-fledged tea party with my youngest daughter and since then our family has enjoyed them many times. This time I used our grandmothers’ dishes as an extra special place setting, figuring they don’t get out of the china hutch enough.

Recipe for Cream Scones

If you want to make them lighter you can use half and half or milk.

Preheat oven to 375° F (190° C) and place rack in middle of oven. Line a cookie sheet with parchment paper.

2 cups (280g) all-purpose flour
1/3 cup (66g) granulated white sugar
2 tsp (10g) baking powder
1/8 tsp salt
1/3 cup (76g) chilled, unsalted butter
1 large egg, lightly beaten
1 tsp (5g) pure vanilla extract
1/2 cup (125ml) heavy whipping cream
Egg mixture for brushing tops: (brushing the tops with mixture helps with browning the tops)
1 large egg, lightly beaten
1 Tbsp heavy cream

In a large bowl, whisk together the flour, sugar, baking powder and salt. Cut the butter into small pieces and blend into the flour mixture with a pastry blender or two knives. The mixture should look like coarse crumbs. In a small bowl combine the egg, vanilla and whipping cream. Add this mixture to the flour mixture stirring until just combined. Do not over mix this mixture. Knead dough gently on a lightly floured surface. Roll or pat the dough into a circle that is 7 inches (18cm) round and about 1 1/2 inches (3.75cm) thick. Cut this circle into 8 triangular sections. Alternatively, you can cut the the dough into rounds with a cookie cutter. Place on prepared cookie sheet. Brush the tops with the egg mixture.

Bake for 15 minutes or until lightly browned. Transfer to a wire rack to cool.

Variations:

-Add 1/3 cup dried tart cherries
-Add 1/3 cup miniature chocolate chips
-Add 2 tsp lemon zest and 1 Tbsp poppy seeds
-Add 1 Tbsp poppy seeds and use 1 tsp almond extract instead of vanilla extract and       sprinkle top of scones with sliced almonds after brushing with egg mixture.

I must say the only variation I have tried is the cherries and we love it so much that I haven’t tried the others.

I hope you enjoy these as much as we do and if you would like to follow the Olympics here is the official website. Perhaps while nibbling a fresh from the oven scone . . .

~Sue

Recipe courtesy of  joyofbaking.com