The Weekend Dish – Peach Cake

_MG_9645peaches
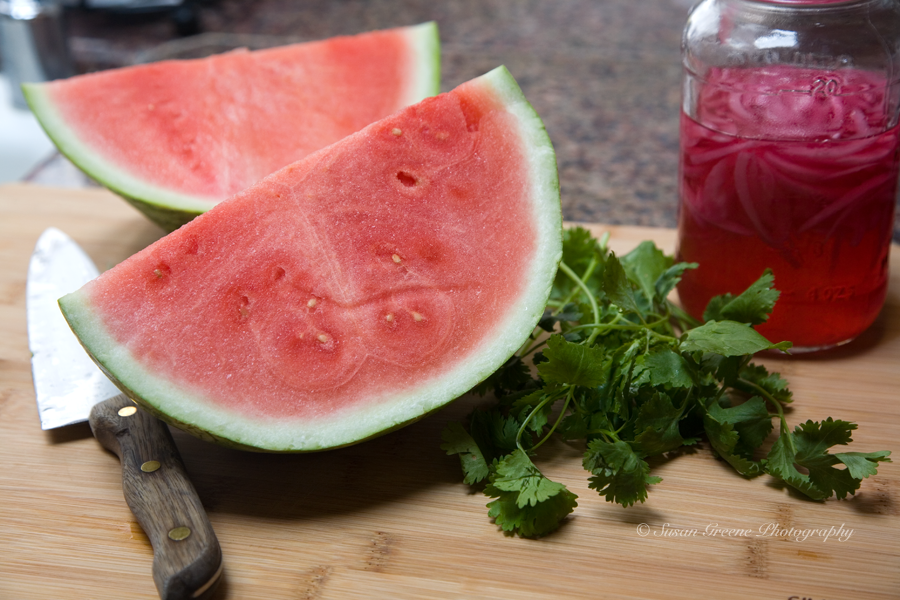
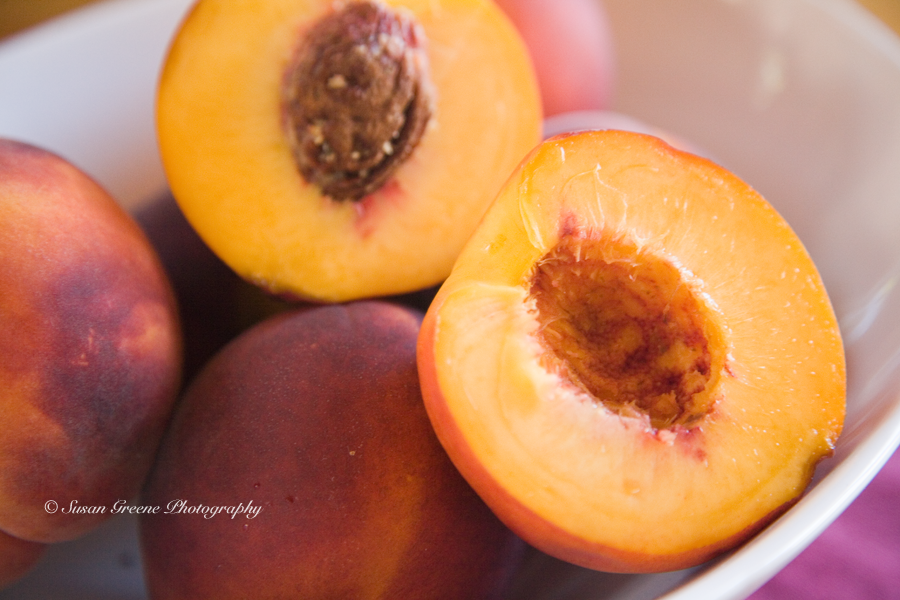
This time of year the fruit is plentiful and delicious. The peaches, plums, cherries and berries are emitting their sweet fragrances as I walk in the produce aisle of the store. Being especially fond of peaches, I like to use them as much as possible during this season. Aside from eating them alone, I like to add them to cereal, ice cream and use them to top pancakes or add them to a cake.

_MG_9687peach cake

I first tried this recipe from Cook’s Illustrated about a year ago and dreamed about it until this peach season came around again (I suppose canned peaches could be used but I like the seasonal anticipation). The recipe takes a little more effort because half of the peaches are roasted and all are macerated.

_MG_9649peachesBut it is well worth the effort.

_MG_9652peaches

_MG_9656peaches
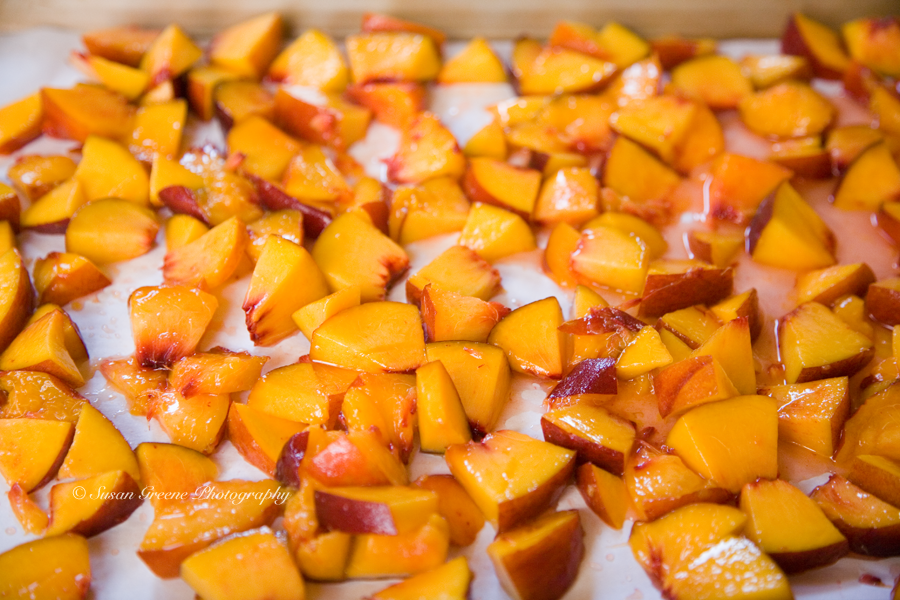
Roasting the peaches concentrates the flavor as well as releases some of the juices thus helping to avoid a soggy cake. Panko crumbs are added to the roast peaches after they come out of the oven to further ensure the avoidance of “soggy cake syndrome.” I didn’t use the peach schnapps called for in the recipe because I like the true peach flavor to shine through.

_MG_9690peach cake

                                      Peach Cake

adapted from Cook’s Illustrated

  • 2 1/2 pounds peaches
  • 4 tsp lemon juice
  • 6 Tbsp plus 1/3 cup granulated sugar
  • 1 cup all-purpose flour
  • 1 1/4 tsp baking powder
  • 3/4 tsp salt
  • 1/2 cup packed light brown sugar
  • 2 large eggs
  • 8 Tbsp unsalted butter, melted and cooled
  • 1/4 cup sour cream
  • 1 1/2 tsp vanilla extract
  • 1/4 tsp plus 1/8 tsp almond extract
  • 1/3 cup panko bread crumbs, finely crushed

Preheat oven to 425°. Line a rimmed baking sheet with foil and spray with oil spray. Pit the peaches and slice into 1/2 inch thick wedges. Place 24 of the slices into a bowl and gently toss with 2 tsp lemon juice and 1 Tbsp sugar; set aside. Cut the remaining peaches into thirds crosswise. Place in a bowl and toss with remaining 2tsp lemon juice and 2 tbsp granulated sugar. Spread peach chunks on prepared sheet in a single layer and bake until the juices begin to thicken and caramelize, 20-25 minutes. Remove and cool to room temperature.

Reduce oven temperature to 350°. Grease a 9-inch springform pan. Whisk flour, baking powder and salt together in a bowl. Whisk brown sugar, 1/3 cup granulated sugar, and eggs together in second bowl until thick and thoroughly combined. Slowly whisk in butter until combined. Add sour cream, vanilla and 1/4 tsp almond extract and whisk until combined. Add flour mixture and stir until just combined. Transfer half of the batter to the prepared springform pan and spread evenly over the bottom. Sprinkle panko crumbs over the cooled peaches and gently toss to coat. Arrange peach chunks evenly over the bottom layer of batter gently pressing peaches into surface of the cake. Spread the remaining batter over the peaches and smooth the top. Arrange the reserved peach slices in a ring on the top, using smaller ones for the center. Stir together remaining 3 tbsp granulated sugar and 1/8 tsp almond extract in small bowl and sprinkle over the top of the cake. Bake until toothpick inserted in center comes out clean, 50-60 minutes. Transfer pan to wire rack and cool 5 minutes. Loosen sides of pan by running a knife around the edge of the cake. Remove sides of pan and allow cake to cool completely.
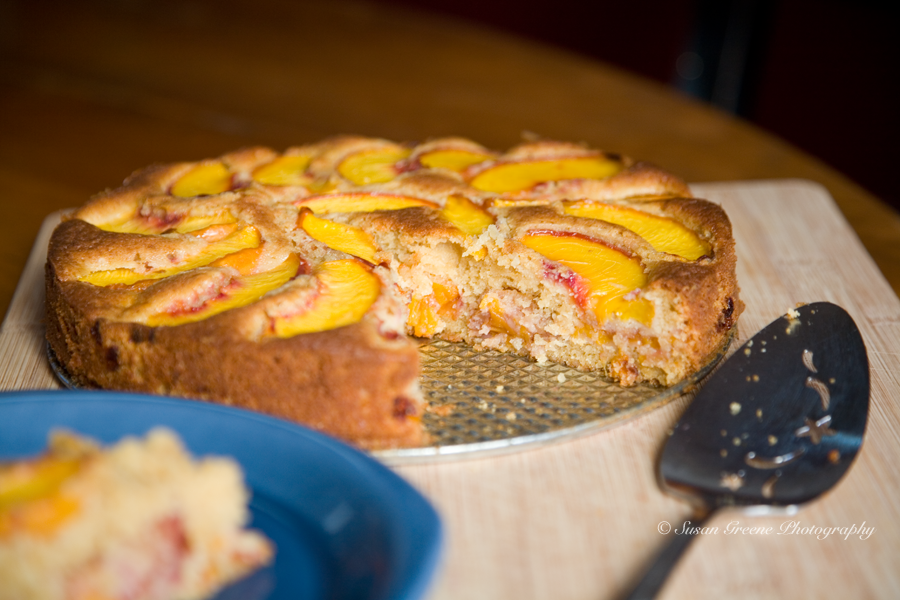
 _MG_9696peach cake

Serve and enjoy!

To summer’s bounty,

~ Susan

surf shutter

_MG_9279surf shutterFor the exploration of the last aspect of the exposure triangle, shutter speed, I slipped into my flip flops and headed to the beach – click on the highlighted elements of the other two parts of the triangle, ISO  (also here ) and f-stop , if you missed them and want to catch up. The shutter controls how long the camera’s sensor is exposed to light. Shutter speed  is measured by fractions of a second and the numbers represent the denominator of the fraction,  a higher number is a faster speed, 500 is 1/500th of a second, which lets in less light and a smaller number is a slower speed, 13 is 1/13th of a second, which lets in more light. The numbers get lower until you get to a whole second which is denoted by 1″ and from there the numbers starts climbing again, my camera’s high end is 30″, or thirty seconds. The shutter also controls whether you will freeze an action in your scene or blur it. If the shutter is open longer, a slower shutter speed, there is more time for the camera to record motion. This is where you can get creative with your use of shutter speed. Moving water is fun to play around with. When exposed using a slower shutter speed, the water takes on a velvety look. For this photo, I used a shutter speed of 1/13.

_MG_9173surf shutterThen to freeze the water and capture the drops I used a shutter speed of 1/1000.

_MG_9190surf shutterThe exposure triangle comes in to play here because when you adjust one of the elements you have to compensate by adjusting one or both of the others to obtain a correct exposure. For the first photo, the shutter speed was 1/13 and the f-stop 22 with an ISO of 100. It was fairly early in the morning and beginning to get bright out (even though the sky was gray with clouds) so I had to shut my aperture down to the smallest opening possible and put the ISO down low to cut the light sensitivity of the camera in order to be able to use a slower shutter speed and capture the velvet blur of the waves’ motion. In the second photo, I raised the ISO to 200 and opened the aperture to f4 and used a shutter speed of 1/1000.

An egret flew in for a look about and stayed for awhile as I snapped away at the yellow-footed beauty. First, I wanted to catch it with detail and freeze any movement it might make and used a shutter speed of 1/125.

_MG_9212surf shutterThen, I wanted to capture the movement of the bird walking along the shore and switched the shutter to 1/13.

_MG_9214 surf shutterStanding perpendicular to the waves is a way to be able to capture the movement. A 1/6 shutter speed was the setting for this one, giving the water a soft, smooth appearance.

_MG_9235surf shutterAt a shutter speed of 1/500, you can see how the details in the water are distinguishable and the wave is frozen in mid-air.

_MG_9273 surf shutterIf your shutter speed is too low and you don’t have a tripod, you may end up with a blurry picture due to camera shake. In general, for hand-held photography use a shutter speed at or higher than the focal length of your lens, for example if the focal length of your lens is 100mm, you want to use shutter speeds of 100 or greater. The longer the focal length the more susceptible the camera is to camera shake. There may be times that you just have to use a tripod to get the shot.

If you are interested in further exploration of capturing motion check out this previous post.

With an eye for action this week,

~ Susan

The Weekend Dish – Watermelon Gazpacho

_MG_9092 watermelon gaz

Some meals and/or certain dishes will stay in your memory long after consumption. It can be the unique flavors, the setting and dining experience or even the plain and simple pleasure of a well-made dish. Last week, I had one of those memorable meals. Some of the backyard family gathered at a local museum for dinner and entertainment. It was memorable for the occasion (the backyard mom’s birthday), the musical accompaniment (a musician playing exotic sounding Latin American instruments; one which produced a growling jaguar sound transporting me to the rain forest) and the delicious food. I chose watermelon gazpacho for my first course and enjoyed it so much I decided to try and create it myself. Working from my memory of the ingredients listed on the menu as a starting board, I came up with this version, making a few changes and adjustments for my own tastes.

Watermelon Gazpacho

  • pickled red onion (recipe follows)
  • 1/2 watermelon
  • balsamic reduction (recipe follows)
  • cilantro, sliced
  • piece of toasted bread to float on top if you choose

Cut the watermelon into chunks and place in a blender.

_MG_9101 watermelon gazWhir at a medium speed, pushing down occasionally to move the pieces down to the blades, until the watermelon is a liquid, about 30 seconds. (This is a yummy drink on its own or with an added squeeze of lime.)

_MG_9105 watermelon gazPlace a few of the pickled onions on the bottom of the bowl

_MG_9136 watermelon gazPour the liquefied watermelon over the onions. Drizzle the balsamic reduction according to your taste, I use about 1/2 tsp per bowl of this size. Sprinkle sliced cilantro on top and lay a thin slice of toasty bread on the top if you choose and serve. Depending on the size of your bowls this recipe makes 4-6 servings.

_MG_9142 watermelon gaz

Pickled Onions

  • 1 cup water
  • 1/2 cup apple cider vinegar
  • 1 Tbsp sugar
  • 1-1/2 tsp salt
  • 1 red onion, thinly sliced

Mix liquids with salt and sugar and stir until dissolved. Pour over the onions in a jar. Sit at room temperature for 1 hour. Keeps in the refrigerator 2 weeks. Also, is a nice accompaniment to meat.

Balsamic Reduction

  • 1 cup balsamic vinegar
  • 1 Tbsp honey

Bring the balsamic and honey (in a heavy-bottomed, non-reactive saucepan) to a boil over medium heat. Adjust the heat to maintain a steady simmer and keep simmering until reduced to 1/3 cup and it becomes a honey-like consistency. (This takes about a half an hour and gives your house a strong vinegar odor but is worth it.)

Just the thing for adding refreshment to a summer evening of dining al fresco, watch out for the jaguars.

Happy Birthday again Mom!

~Susan

What’s an F-stop?

We have explored ISO and the effect it has on exposure the last couple of weeks and next, we will consider another component of the exposure triangle in photography: aperture. The aperture is the opening in a lens, which can be adjusted to be larger, smaller or somewhere in between. The numbers representing this opening are called f-stops. The f/stop numbers have an inverse relation to the opening size: the smaller value of the number the larger the opening in the lens and more light is let in; conversely, the larger the numerical value the smaller the lens opening and less light is available.

_MG_8079anemoneWhen shooting at a wider opening or, a smaller numbered f-stop, the depth of field is also affected. With the lower f-stops or smaller numbers, you have a shallower depth of field; especially helpful when you want to isolate your subject from the background.

_MG_8083anemoneHere, using an f/5.6, the anemone is in focus but the top portion of the photo is beginning to blur.

A smaller f-stop can also be used when shooting landscapes and you want to bring attention to one element or person.

_MG_5453shore cactusSince the ocean is on a very different plane than the cactus the ocean water details turn a velvety blue when using the f/5.6 setting in this photo.

For the egret in flight, a f/7.1 setting was used which results in most of the elements of the photo in focus.

_MG_8564egretWhen everything in sharp focus is the goal than an f-stop of 11 or higher should be used. For this landscape, I chose a setting of f/22.

_MG_8088rocky shoreIf you would like to re-visit another backyard sisters post on depth of field and f/stops using a different subject click here.

Also, if you would like to learn more about exposure, there is an excellent book by Bryan Peterson titled Understanding Exposure, it gives an in-depth explanation of the different aspects of the exposure triangle accompanied by creative and colorful photos.

This week you will find me out looking for depth in my field,

~ Susan

Low Light, High ISO

Traveling, for me, involves evening and night time strolls around cities and visits to museums and cathedrals. All these have one thing in common, the available light is very low. When strolling after dinner and exploring a city, I don’t usually want to carry a tripod and prefer the natural light as opposed to using a flash. So, turning the ISO up helps me get the shot. After arriving late one evening in Oklahoma City, I went straight to the Memorial and arrived as the sun was setting. As night fell and the lights turned on, I turned my ISO up to 1600 and tried to do justice to the solemnity of the location.

OK City memorial iso

Walking around the city of Paris one night I pulled out my camera and set my ISO to 800 and snapped this image.

l'arc de triomphe iso

A night time stroll about Rome lead to this famous fountain and it’s night time appearance. I used an ISO 800 here so I could use a slower shutter speed and let the flowing water blur.

trevi fountain iso This fountain is no less popular at night.

trevi fountain crowd iso


Many museums and cathedrals don’t allow flash photography. At the Centre Pompidou, I turned the ISO up to 1600 which allowed for a shutter speed of 1/60 with an f4 to capture this intriguing work of art.

centre de pompidou isoThe Art Institute of Chicago is the home of many works of art and  I was able to view one of my favorites, Paris Street; Rainy Day by Gustave Caillebotte. Seeing this up close and personal meant I couldn’t pass up the opportunity to capture it. ISO set to 800 for this one; you may find that the lighting in a museum allows a little lower ISO setting to be used.

art institute iso The Museo dell’Opera del Duomo Is the location of the Florence Pietà and after having just seen the St Peter’s Pietà I wanted to see this version, the ISO set to 1600.

Florence Pieta iso

In Europe, the cathedrals are just as full of art work as the museums and flash photography is often frowned upon or not allowed.

The statue of the Madonna and Child, in the Basilica di Santa Maria Maggiore, captured my attention by their outstretched hands and the way they seem to be welcoming and greeting so peacefully.

madonna and child isoRemember to look up in cathedrals for the ceilings are usually very impressive also.

St Peter's ceiling isoThis ceiling from St Peter’s Basilica with the shaft of light shining down is an example of the details given to every inch of space.

Newer cameras’ ISO capabilities have grown tremendously. My Canon 5D original version high end ISO is 1600 expandable to 3200. Last holiday season, I had the chance to use a Canon Rebel T4i with a high end ISO capability of 12,800 which is expandable to 25,800. I took it out in to my neighborhood and shot some Christmas lights hand held and was very impressed with the quality of the results.

Christmas lights isoUsually, I need a tripod when shooting the Christmas lights in my neighborhood but here I used ISO 10,000 and was able to capture this scene.

Sometimes, a high ISO is necessary to get a low light shot.

Try turning off that flash and raising your ISO and see what you think.

~ Susan


The Weekend Dish – Roasted Vegetable Salad

salad 1

Salads are the ultimate creative dish. With lettuce as the canvas, the possibilities for additions are practically endless. Then, there are the other types of salads that don’t even use lettuce. Just look at the length of some salad bars! This backyard sister’s nightly dinners invariably include some sort of salad. The same is true when we have a gathering of the extended clan. It was just such an occasion, a gathering of the extended clan, that the youngest backyard sister served this roasted vegetable salad. She is one for creating sans recipe but she so kindly shared her salad creation technique.

Roasted Vegetable Salad

  • Asparagus, cut into inch long pieces
  • Potatoes, cut in to bite size pieces
  • Green Beans, whole or cut in half if you like
  • Baby Carrots, cut in half lengthwise

Roast these vegetables in enough olive oil to lightly coat and a bit of garlic at 350° until just fork tender, the potatoes will take longer than the others. Everything but potatoes will take about 20-30 minutes and the potatoes will take about 45 minutes.

  • Romaine lettuce torn or sliced in to bite size pieces
  • Red Onion, thinly sliced and cut in slivers
  • Parmesan Cheese, grated
  • Salt and Pepper to taste
  • Olive Oil
  • Balsamic Vinegar

For assembly, tear or slice the lettuce in to bite size pieces. Place the lettuce and the remaining ingredients through the cheese in a salad bowl large enough to have extra room for tossing the salad. Dress with equal parts olive oil and balsamic vinegar using the amount you prefer for your salads.

salad 2The youngest backyard sister simply adds the oil and vinegar straight to the salad. Finally, season to taste with salt and pepper.

Note: the amounts of the ingredients will depend on how many you are serving, generally one head of romaine lettuce serves 4-6. Also, feel free to substitute other vegetables for roasting: red bell pepper, eggplant, or mushrooms, if any of the others are not to your liking or in season.

There you have it – the steps to a delicious and healthy accompaniment to any meal or maybe even a meal in itself if you are so inclined.

saladMaybe you have some of these vegetables in your own garden, lucky you if you do.

~ Susan

Exposure and ISO

skies 0205The skies in Europe can be so interesting and gorgeously filled with cloud formations. They will be the subject while exploring exposure and the place of ISO in the triangle.

The exposure triangle is a term used to explain the elements that work together to create a well-exposed photograph. It has to do with the amount of light let in to the camera and the three components used to control it: aperture, shutter speed and ISO.  Aperture refers to the opening in the lens and how large or small it is. The numbers representing aperture are the f stop numbers and the larger numbers represent a smaller opening. Shutter speed is how long the film or sensor is exposed to the light and the ISO is the film or sensor’s sensitivity to light. All of these elements can be adjusted to give different results. Here’s where you will have to venture out of auto mode and begin to play around if you want to learn the effects of changing these settings.

I am exploring ISO today and these shots taken at dusk in Zurich illustrate the effect simply changing the ISO can have on your result. These photos are shown how they appeared straight out of the camera. The aperture, f/7.1, and shutter, 1/50, settings are the same on all the photos. The first is with an ISO of 1000:

skies 0330Noticing that the pinks, which were appearing in the sky, weren’t coming out in the photo I lowered the ISO to 640:

skies 0331This was better but I still wanted more so I lowered it even farther to ISO 400

skies 0332The lower the ISO setting the less grain will be introduced in to your photo. In the middle of the day, when there is plenty of light, using an ISO setting of 100-200 will give clear, colorful photos.

skies 9850skies 9231The ISO can be low and the f stop high and there is no problem capturing enough light to obtain a good exposure. When looking to the sky, I like to use lower ISO numbers to obtain true colors with low grain, or noise.

Sometimes, a darker mood is the goal.

skies 0357Let your artistic eye be your guide.

Next week, I will consider the effects of a higher ISO and how it can be utilized in low light situations.

Until then,

~Susan

Fireworks!

fireworks 2There is nothing for making a celebration grander than fireworks! Watching the flare ascending and then bursting with colors filling the sky with light gets my spirits soaring as high as those fireworks.

fireworks 4July 4th marks our country’s 237th birthday and it’s the perfect occasion to take in a fireworks show. I have the opportunity to be on the edge of the continent, in a bay and when the weather is nice, I can see many displays from a seat at the local beach.

fireworksWhen one show ends you simply sit back and wait for the next one to begin.

fireworks 5Sometimes the down time is filled with people’s own shows.

fireworks 1With so much going on, it’s the perfect opportunity to capture the revelry.

Here are some tips for you to capture your experience:

First you need a camera with manual mode. To minimize camera shake, a tripod and a remote release are recommended. Set your camera to a low ISO setting of 100-200. Fireworks are bright and an f-stop in the mid range of f/9-f/16 lets enough light in to allow the colors to stay true and not get washed out. Set your shutter to bulb (B on Canon), this setting will keep the shutter open as long as you hold down the shutter button.  Make sure your lens is on manual focus, and focus to infinity or wait until the fireworks begin and focus on them. A medium  telephoto zoom lens works well, I use 24-105mm. Now position yourself so you will have an unobstructed view and you are ready to shoot. Listen for the launch and release the shutter and hold open for anywhere from 2-30 seconds. The longer you hold it open the more bursts you will capture.

fireworks 3Some locations add music and the fireworks exploding to beats in the songs makes for an especially thrilling experience.

fireworks 6Happy Independence Day and hope you can get to a fireworks show to celebrate, and stay until the grand finale!

~ Susan

The color of light and balancing the white

A light is a light is a light, right? Nope. Light sources can be warmer (with more reddish tones) such as a candle or an incandescent light, or they can also be cooler (with more blueish tones) such as in the shade or a cloudy day. You may have noticed that some times your pictures have certain tints to them and the color doesn’t look natural. This is where white balance comes to the rescue. The camera will add more of the missing hue in an effort to balance out the tint created by a light source and achieve more natural looking colors. I used the last blooms of the orchid on my patio as a subject. The plant is in open shade. Auto white balance will often produce a fine result but sometimes some tweaking is necessary or just fun to try.

This is the auto white balance shot:

auto WBIn this case, it is a fairly accurate color depiction but I will carry on. Different cameras have different white balance settings so you will have to get out your manual for your particular camera’s settings.

Next I used the daylight setting:

daylight WBThis adds a slight warmth to the picture.

The shade setting, symbolized by a house with diagonal lines off one side, is next:

shade WB Shade is a cooler light and the camera adds warmer tones with this setting.

The cloudy setting:

cloudy WBOnce again warmer tones are added.

Next the tungsten setting:

tungsten WBThe blue tones are strong with this setting because pictures taken under tungsten lighting will have a strong orange hue to them and the blue will balance it out. Generally, this is used indoors.

Next, fluorescent setting:

fluorescent WBThis is a cooler hue also.

Another method of white balancing is using the Kelvin scale of color temperature. The lower numbers are the warmer hues so the camera will add cooler colors. When I set my temperature at 2800K this is the result:

2800K WBInversely, the higher numbers are cooler temperature colors so the camera adds warmer tones, this is set to 10,000K:

10000K WBThen, there is a range in between these. You can also set a custom white balance by taking a picture of a white or neutral gray sheet and thus telling your camera what white is and it will adjust accordingly.

There is no rule that you must use a certain setting in a certain condition. You can decide what you prefer as the photographer. Maybe you like warmer tones in your photos or cooler. It is fun to play around with them and see what you like; just one more creativity tool!

Performing a balancing act,

~ Susan

under a watchful eye

towers6Any sunny summer day at the beach, you will find them; working the shore with red bathing suits, and hanging red canisters at the ready, eyes fixed on the water. They are lifeguards and their “office” – the lifeguard tower. The towers dot the sand up and down the beach.

towers7Summer time is the busy season but they are at their posts year round.

towers11The water is too enticing, most days, for all sorts of water activity enthusiasts to be left unattended.

towers10Or, some days there are more birds than people but there is still a lifeguard somewhere on the beach keeping watch. The lifeguard tower itself is a simple structure, architecturally speaking, constructed of wood with a ramp leading up to the door and shelter. It is elevated about three feet off the ground, just enough to give the guard an unobstructed view of the beach and water. These towers remind me of many a day spent at the shore and feeling sentimental, I chose the lifeguard towers as a subject of an evening photo shoot. The sun, low in the sky, on its way to setting, giving a golden hue to the light. I decided to walk around the tower and play with different lighting situations. First, I placed the sun behind the tower thus back-lighting it.

tower1As you can see the tower is more in silhouette but the background is the ocean, which I like. Next, I walked to the side and gave it a side light.

towers5First one side, then the other. . .

towers4This creates different effects and backgrounds so keep this in mind when choosing what to photograph. Turning and facing the tower and using front lighting was next.

tower2This gives the front of the tower full exposure and allows the ramp to be visible. Another angle using front lighting is explored.

towers12

The towers are a constant at the beach. They get moved back away from the water in the winter and brought closer to the shoreline in the spring but are ever present on the sand standing tall. Sometimes, they are used in perhaps unexpected ways.

towers8The blue towers are iconic representations of the beach to me and I appreciate the role they play in the dance of the shore. If you have an interest in lifeguard towers check out the fun colors and patterns they were decorated with a few years back in an earlier post: “Flashback Summer of Colors“.

Hearing the crashing surf,

~ Susan